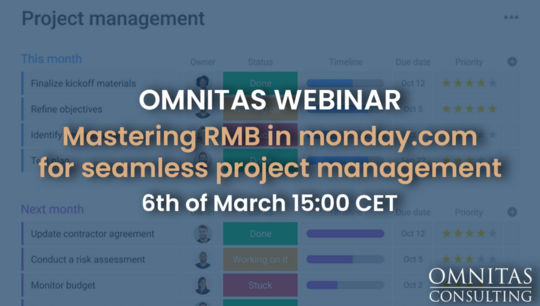
On Demand Webinars
Mastering dynamic project task templates in monday.com
360 views
Discover the power of dynamic project task templates in monday.com with Make, in our upcoming webinar hosted by Lucas, Project Team Lead and Make expert at Omnitas. Learn how to create and adapt task templates using a visual template board, simplifying project management without the need for complex automations. Gain insights on using values like default responsibilities, role assignments, and timeline planning in relation to project deadlines. Enhance your project efficiency with advanced timeline generation for all tasks based on template settings. Sign up now and join us to streamline your project management approach!
View transcript
Okay, so let's go ahead and get started. My name is Lucas. I'm one of the project team leads here at Omnitas. And as mentioned today, we'll be looking into how you can use monday.com to simplify your project management in terms of creating dynamic task templates, and also how you can take that to the next level and generate some timelines for those tasks as well. So the agenda for today is we're going to first look at the project task template creation and how these are actually used. How from a user experience you can quite simply generate a bunch of tasks based on a selection of three templates. In this use case we're going to first look at how you can do this just using monday.com automations. monday.com automations are fantastic, and most of the time you're going to be able to do some really cool stuff with little to no experience in implementation of advanced systems or programing. It's a very visual way of automating, but we're also going to look at how we can use a dedicated monday.com board to make the administration of templates a lot simpler and more straightforward, and how Make kind of fits into that as well. We're going to be looking at also pulling some of the standardized values for these templates. Of course, what the task is. But also some other information like default responsible users to be the person responsible for a task, and also some standardized timings for that task within the project as a whole as well, which is going to bring me into the next part of today's webinar, which is going to be the task timeline generation. So we're going to look at having the tasks of the project get their kind of starting point for planning. And after that you can go into a Gantt chart, which we're also going to look to, and kind of tweak that so that all of your projects are in line and we're not overdoing our projects or anything like that. Right. So let's go ahead and jump straight into monday.com. Okay. Um, so what we have here is one very simple board. Now this is simplified for the case of this webinar. But what we have here is just for basic groups. We're going to have some new projects coming in at the top. Once we start planning for the project, it's going to be moving down to the next group, an active project. And then finally we have a completed project down here at the bottom. So one item here is a project and then we have our tasks. We'll expand this on sub item level. So our example project here a monday.com CRM implementation as a project in this case has our six tasks beneath it. But we're getting ahead of ourselves. Let's start with this new fresh project. We have an example of a monday.com project management implementation. We've gone ahead and assigned a project manager to that. And we're also going to go ahead and move that into the planning stage here. So what we've also done is we've set a deadline. So we have here a target of when we're looking to have this finally delivered. And now we're going to move on to generating our task templates. So what I've included here as an example is we have three different templates. We have templates for a small, medium and large project, which is going to differ a bit in how many tasks we have, but also the length of those tasks. And if there is a default responsible person for the task or not. So let's go ahead and click small here as an example. And we're going to generate three tasks that are going to start popping in here on sub item level. So in this case we have an initial scoping call. We have a development phase. And then finally a handover call. We also had a default responsible person for each tasks. And then we also have some information about weeks do before deadline and a task duration. And I'll get back to what these mean in a second. So doing this the task template A here stands for automation in this case is going to be one of the native monday.com automations. So it was this one right here. When Task template A changes to small, create a sub-item and then create a sub-item and then create a sub-item. So three sub items in total. When looking closer into this automation we can also here define for each sub item what the information should be. So for example here as we saw initially we create our scoping call and we assign the default response. Well as my user in this case we also have the default duration of that task and when it should be started. So again, this can be done in a monday.com native automation. As you can see, there are some some pros to it. But also of course there are some cons, especially if you have a lot of task templates or a task template with a lot of tasks. So let's take this one. For example, the large template where we have a lot of tasks. Let's say we initially create this one, but then further down the line we realize we want to add some tasks to it. Maybe we want to remove some tasks, or just a tweak exactly what they are going to entail. And when doing so. For example, let's say you want to add it somewhere in the middle. You have to go in here and figure out which one it is you actually want to implement. And then you're going to update that automation. So. From an, let's say less than perfect from a user experience point of view. So what we have here next to it as well, which we're going to look at soon, is the task template using Make instead. So what that uses is a task template board. So let's jump to that board. So here we have three task templates as well, the same ones. And just like our project board there it's a lot more familiar. So here. But rather than having that be in automations or selections is going to show here as main item response to a template. And then these sub items is also going to correspond to the sub items being created in our project board. So as you can see here, it's a lot easier to get a full perspective of what does each template contain. If you want to add a new one, it's as simple as just creating a new sub item. It's essentially just going to copy over whatever you see here as sub items is what you're going to get in the other board as well. And for that, it uses a very simple matching for which template to use. It simply matches the template that you click on over in the project support here. For example, if you click medium it's going to search for medium in this column as well and then load over all the sub items. So let's try that one as well. We're going to go ahead and remove these tasks. And then we'll go ahead and select small for Make as well. So essentially it's the same thing. The end result is more or less the same. But the administration of actually creating these templates, changing them, updating them and removing them, if so, be it. It's going to be a lot simpler. And there we have our tasks again. Okay. So in this case we pull over three templated values. We have again the responsible weeks due before and the task duration. So the way that the generation of timeline works is that it takes into account these two values for each task. And assumes that all of these tasks has a shared relationship with the project deadline. In this case, and this can be different, it can be that it's going to be starting after a start date instead of a deadline, or it can be somewhere in between. So this is very dynamic and exactly how you want to set that up. But for this example, the two dimensions that we picked was: This is how many weeks before the deadline this task should start and the task duration. And here we've also mixed both weeks and days. So for example, the scoping call in this case is going to start three weeks before the project deadline. And that task is going to be a one day task. So the way to activate this one is going to be we click on this generate button right here. That's going to send a ping over to Make, which is going to go in here and fill those timelines. So as we can see now we both got a timeline on sub item level for each task. And we also have a mirrored version on the main item that is going to show us the summary of the earliest task to the latest task. So we also get a coherent project deadline from this as well. All right, let's move in to make and actually have a look at what this looks like on that end. So let's start off with the creation of tasks when selecting a template. So for those of you who haven't been in Make before, what these circles are called modules is essentially one action. So one action more or less is going to be represented by one of these blobs or circles. So starting off here what we have is called a webhook. And this webhook is simply a receiver on the backend for when something happens in monday.com. This is our starting point. So if we jump over to monday.com again we can see how that is set up. Go into integrate here and the board automation. Scroll down a bit here. We can see for example when task template changes to anything send a webhook. So that's how it looks on the monday.com end. Meaning that when you click here and you select anything here. We will receive a signal to this starting module in Make. And along with that we're going to get some information. For example, what's the name of the item? What's the unique identifier of the item called an item ID. And also some information like when did this happen? So step one: we receive a signal to this module. And then it sends a pulse throughout this chain of operations as well. So first thing we do is we're going to search for a template item that we just looked at. So as we can see right here we have it set up so that we're going to search in this specific board the task templates board right here. We're going to search in the column task template. So this status column right here. And we're also going to pull with us a dynamic value, which is going to be the value that we are searching for. So in this case it's going to be the text value from our webhook. So one thing that we do also receive from our webhook when you send a ping is what was the value that triggered this response. So in this case, if we open up our output data right here, we look at value and label right here. We're going to see that the trigger for this one was someone clicking the text small in monday.com. So what we're doing here is we're going to search in that column. And we're going to search for small. And we're going to find a match of an item. Next up we're going to do is we're going to retrieve that full item so that we can get the template tasks as well. So from our search module right here, we mapped in the unique identifier of the matched template which is going to retrieve the sub items. What we do next is we have what's called an iterator. And what an iterator is, is essentially simply taking one signal and splitting it up into multiple signals. So in this case we have one signal coming in and three signals coming out. And this corresponds to one full task template which we got a match for in our template board. It's going to be split out to be doing something for every sub item. So if we look into this iterator right here, we filled in what's called an array of sub items, which is essentially just a list. So for each sub item in our template board we're going to do something. And what we're going to do is we're going to create a sub item in our project board, and then we're going to update that with some column values as well. So we can see here that the iterator that had one array going in is going to throw out our three different task templates. So here we can see the scoping call, the development and the handover call. So moving on then here we have a sub item board which is going to be the sub item level of our project board. And we've also mapped the name dynamically from our iterator. So as you can see, when I hold over my mouse here the iterator pulses. So right here we have the name for each individual pulse. And then finally we're also going to pull along some additional column values. So here we're going to map in the item ID which is again the unique identifier of a single row in monday.com, we're going to map in the created sub item that was just created by the previous module. And then we're going to add some column values like iterator. We're going to bring over the weeks due before deadline and the task duration. So all in all we have about six modules creating a full task template generation integration. Cool. Moving on to the next step then, which is going to be slightly more complex, but more or less the same principle. When we click here on generate, we have another webhook which we can confirm by going in here. In this case we have when generate timelines changes to generate send a webhook. And that webhook is going to go to a separate Make integration which is going to be this one. So here again we have six modules. Similarly to last time we start off with a webhook module which is going to get a signal when someone clicks generate we're going to get that information about which item this was actually clicked on, which we are then going to retrieve. So what we retrieve here is again going to be whichever item was clicked on. And we get some information from that as well this time. This time we don't have to search in a board. We already know which item we want to work with. And from that item, in this case, that monday.com marketing implementation we looked at before. We're gonna iterate on the sub items again. Now, the difference between the sub items in the previous one is that here we were iterating on the sub items in the template board to copy them over. In this case, we're also iterating on the sub items, but within the project board, since these are the items we want to be generating the timelines for. So in this case, rather than creating items, we're going to do some calculations instead. So what we want to end up with is a timeline. So we want a start date and an end date. That is going to be based again on the weeks due before deadline. How many weeks before the tasks need to start. We're going to add on the task duration to whatever we get from this piece. And all of that is in relation to a deadline of a project. So the first calculation and if you've ever worked with things like an Excel formula, this might look a bit familiar. So we're going to create a what's called a variable just to save that and make it a bit easier to work with. And we're going to use an add days function. So if I hold my mouse over this it will show me a tooltip where it says returns a new date as a result of adding a given number of days to a date. To subtract days, enter a negative number. So in this case, if we jump over back to monday.com quickly, the logic that I wanted to have here was that we're going to look at a date. So the first part of that function, and then we're going to subtract a number of weeks from that date. And that will be our start date. So in this case here I mapped the date column value from the previous module over here where we fetch that item that we just clicked generate on. And then we're going to have a semi column for the next part of the parameter. We're going to do negative as a minus here. Since we want to subtract dates and not add to it. And then here we pull the numbers column. And it might be difficult to tell here because it says numbers. But the numbers column is this column right here, which if I click over here in developer mode, I can see that this is the unique identifier of that column. So we're going to do whatever it says in this column times seven. Since we want this in days instead of weeks. And that will give us ultimately a date as the start date. So in this case it became 4th of April as an example. As the second step then. Now that we have our start date, we're simply going to add on a number of days, which is going to be pulled from this task duration. So we're going to do our days again. We're going to in this case map in the end date that we just calculated. And then we're going to remove, or sorry, add the other way around. We're gonna subtract to get the start date, since the end date here is going to be the end date of the task. So to get the task duration, we work backwards using the days. So what we end up with for each sub item then is going to be an end date and a start date, which finally over here we're going to simply update to the monday.com item. So here again we're going to update the each and individual sub item. We're going to pull the unique identifier from our iterator which is going through each sub item. And then in the timeline column we're going to map the to and from values from our variables. So slightly more complex, but it also works really dynamically. If it's the case that you want to switch them around, you want to either have the source date that we're going to compare to everything be, instead of the deadline, we want the start date. Then we can switch that around in Make. We can have the weeks due before week B weeks start before, we can have task duration and days or weeks. So the options here are really endless. But in either case it's going to be Make filling in those pieces. Whereas the monday.com automations, no matter how great they are for most use cases, is one place where it falls short, but Make can kind of come into the picture and save the day. All right. So let's say this was a real implementation project right here. We've gone ahead and planned our initial project. We created the medium style task templates. We generated some initial timelines. And now we're going to move on and probably assign the last few pieces here, which aren't always going to be the same person from the templates. And then it might be the case that we also need to be aware of that. These are the default timelines, but we might want to tweak this around maybe when I move the entire project, or we just want to kind of fine tune the specific planning of this project. So what I've done is I've also added a Gantt chart to this demo so that we can kind of see how this will fit into our general projects pipeline. So right here we can see our one, two, three projects which is shown by the green color. This is the full project timeline. And then these yellow bars. Below is the timelines for each individual task. So I go ahead and zoom in a little bit in monday.com within the Gantt chart. It's dynamic in a sense as well that if I, for example, move this task, let's open it quickly and confirm that currently the timeline is April 5th to 18th. Let's say we want to move that up a bit. I can simply drag and drop this, and now that we open it again, it's now April 9th through 22nd. So that's generally the full use case is going to be just that the automatic task generation and timeline generation. It's a huge time saver just to get something to work with. And then as the next step, you kind of fine tune the details using things like the Gantt chart or comparing by some other resource management setup. -All right. -Pausing quickly as well for -some questions. -All right. Fantastic right. So no question so far. Okay. So this is kind of the course setup of it. Of course you can tweak this into a million different types of combinations. For example in the templates here to show an example. Now we're pulling a default responsible. This might be a default roll to make it simpler to assign in the next step. It might be that we want some brief information or a more in-depth description of each task, and the more information that you want to put into these types of templates is when this kind of template board is really going to start proving its value. When we have these few templates, it might make sense to initially set it up with one of those monday.com automations. But let's say you have 30, 40, 50, 60 templates that are really specific. At that point, it's going to be near impossible to administer that using the automations. -Great. -All right. -So no questions as far as I can see. So, in that case, we will call it a day. I hope this webinar was helpful. Hopefully you learned something new about both monday.com and Make. Take care. Have a great day.