On Demand Webinars
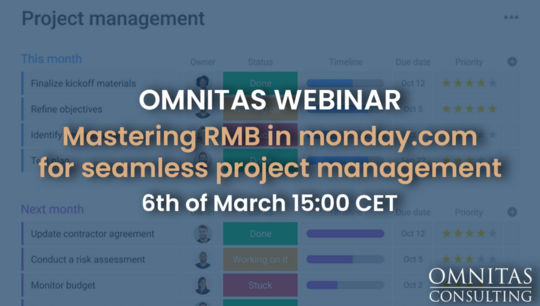
How to optimize your time and resource allocation in monday.com
249 views
Join us for an exclusive webinar hosted by our CEO, Thomas, as he delves into optimizing your time and resource allocation with monday.com. Discover how to streamline time planning and tracking for your team, seamlessly connect time reporting with project tasks, and ensure accurate, real-time updates. Learn about our innovative Role/Skills board, which provides a comprehensive overview of team-specific capacity for incoming projects, simplifying the planning process. This invaluable session will equip you with the tools to allocate staff efficiently based on their current workload and capacity, enhancing productivity and project success. Don't miss this opportunity to elevate your team's performance with expert insights and practical strategies!
View transcript
Okay, I think we can get started. So welcome to today's webinar on how to optimize your time and resource allocation in monday.com. This is a part of our new professional service operation solution that we built. We're not going to focus on the whole suite today. You can read more about it on our webpage. Go into solutions. There are also additional YouTube videos around the full solution. Today we're going to look at the resourcing and time reporting aspects of this. So what we've done for the professional Service operation suite is that we've taken our time reporting and planning app and really revisited how you can leverage that and optimize it for resource allocation and planning on multiple levels. so some housecleaning first, of course, we need, some kind of reference list. So in this case we're using projects. So we have projects in normal number because this is a demo account and we don't want to waste time on unnecessary typing. What we're also going to be working with in this solution is roles and skills. So we want to assign roles to work items. And the reason why we want to do that is because we want to see at the high level, can we actually execute on the plan before we go into the minutia of assigning individual. Something you might see as well we have leverage the teams function in monday.com. So we have junior tech as an item here. And we also have a team called Junior Tech. Same with senior Tech. We have a team called Senior Tech with the relevant people. The reason why we do this is because in the end, we want the resource allocation to be on a role and skill level, but also working with the people column them, so we can leverage the workload widget inside of monday.com. Cool. So with no further ado, let's jump into planning. So with the planning, we'll start in the main board I'm going to close down the left menu so we see a bit more. So this is what our planning view looks like. You can still assign a consultant and individual. We have the ability. You're going to see that later to push timelines. We are working with company and projects. We are selecting the role. And we then automatically fill out this person call. And I'm going to show you how we do that. We have the date which represents the monthly volume in this case how many hours if we want any kind of notes. And then we do have some formulas to make the hours so negative, because that's the way we can compare plan versus actuals. We are mirroring the hourly rate from the project. So we can also get some revenue numbers. And we're also using item default values to make sure that every single item here has the status planned to make it nicer and easier for our reporting later on. Sorry. So right now we're leveraging the planning view in our time reporting suite. It also exists as a standalone app. So let's jump into that. This is what it's going to look like in the end. We're going to have the company the project, the role and the skill. We're going to have our notes. We're going to have the total amount of hours that we allocated. And then as you can see, we can allocate on our allotment per each month. But let's take some time and actually review some of the settings for you that are not used to this, this app. So we go into the settings we can select from what time period we want. the plan to start. We can select how many months we wanted to do and level one company level two project level three role and level four would be our notes in this case. we have said that company project and role is required. So we require three levels, not the fourth. What person column are we going to use? None. Because we're at this point in time only allocating resource roles or skill sets. We have our date column. We have our time column, what status column to show. And that's our push. I'm going to show you how that works. And we can also say notes. You know note is when we mouse over something and we write here, but we also have that as a column. And I'll show you how that works. Really, really well. We can also group these by different variables. And right now I've said group this by level two Meaning we have each project separated. We could do this by client as well. We could do this by further down into what role we want to do. And we can also multi-select some of these. So you have a bit of freedom of how to group these. And when we want constraints on what alternatives we can Cascade. That's what you do over here. And of course we need to select our managers who are allowed to work with everyone in this view. Cool. Second thing. We also have additional conditional formatting where you can do on a cell row, column or total. And you can add whatever kind of color and values that you want. In this case, we don't really need any color indicators. And we also have the reference boards. This is a really important one, especially if you choose to actually show that in the main, table company. It's a text column, project Is a connect to board column because we want to mirror the hourly rate. We could, in theory, do the project as a text column as well, because we do have the option to do a V-lookup of the hourly rate. Role is a text column and it does V-lookup for the role and skill as well. So let's look at those. That's why these reference settings are important right. So company is pulling here our projects our polling there. And this is where we could have added that V-lookup functionality if we wanted. But we've done it down here. So from the role and skill board look for the role and scale right and output that into the role and skill table here. So we have in this app now built in the lookup. So I know there's plenty of V-lookup kind of solutions on the marketplace. But if you're only using our apps and you need to look in correlation with them, we actually have it built in now. And level four does not require a reference list. So that's why free text is set to on. Okay cool. So let's look at what it looks like. So I want to add a new thing. So we want to add let's go with the top of the list here. So for this company let's add something to project one. And you can see we only have project one here. Whereas for Cartwright we have project two. So this is what I meant with the cascading options. So project one and we already have all the roles here. So maybe if we go to to the other one project two, we have a junior tech and senior tech, so I'll add a junior recruitment consultant. I don't put a note in here right now. The note is not required okay. And here you see it added my junior recruitment line and I can now start putting some. I can put let's say ten hours in here. Ten hours in here. Let's say that I want to add actually, let's remove this one and say I want to add a note to these ten hours. I mouse over, I have the dog here and I can say this is my, kickoff journal workload save now, it created a new row for me so I can actually allocate additional hours towards that same note. And here, I could allocate additional hours again, make a note and say. Phase one or something like that. And now I have a new line with that. Note that in turn can get something. And of course we can add on the main one without any notes as well. Okay, so I made a plan for these three items. And now for some reason, this whole project got delayed. So I don't want to say try and delete and retype these. So what I can do is I can actually say, push this three months in the future, post this three months in the future, and push this three months in the future. And as you see, it actually moves everything accordingly for us. Done. So that's a very nice way. And the cool thing with this is I'm using a normal status column. And monday.com automations in the back end. So let's look at that. So I have. Okay. Got it. Thank you. Let's stay with this expanded mode because it's easier to follow along with when the status push changes to -12 month, push date by -12 months and set push to push. So we're resetting the button all the time. We've done one of those automations for every single status label that we have. And the push option again we have the minus and we have the plus. And we put the push in the middle just to make it nice and tidy. And we can push back and forth as well. So we could move this minus one month as well. And again, because maybe I want to keep moving things. That's why I'm setting the automation to reset this to push all the time. So now I've done my skill base or roll based allocation of work. What I then can do is I can go into my role workload widget, and this is why it's so important that we actually assigned the team in a person column, because then we can see this nice little workload widget based on our roles and see how are we doing. And I can see here now that we have over allocated our junior resources for recruitment, let's go with it for now because this is a demo of course. But you know, you can always expand from here and you can push those around, or you can go back to your planning and push things around. So we make sure that we first, on a high level have the people or the roles or the capabilities that we need to execute on the project. And then we can go into individually based allocation. So we also have an individual workload widget, and that individual allocation can be done in a few different ways. It can either be done by looking at everything down here that's unassigned So I have some unassigned stuff down here. I can click on it and I can assign Thomas Karlson as the consultant for this, and I can click on this one here, and I can assign Aaron as the consultant for this. And now I over allocated Aaron. So let's make sure that we split that work with Anthony. And now Anthony's over planned. You see the effect. So one one of these options you can either use like I said unassigned down here. You could also go into a role and skill based table where we have now use the group by feature to group by the role and skill. and keep in mind that you currently can't do this in a person column. So you can't use a person column currently for the group I think it's coming. so that's why it's also important that we actually have the role and skill set as a text column, because that's when we can do this group by. So we're doing the group by we can see all the assignments. And in the end here we can see that we have some unallocated, resources, which we then can if we want to multi-select and assign to Julia, for example. And then we probably have allocated all the rest. We're leaving one for now. We could also look at this from a company perspective. What kind of job have we planned per company. And we can also look at this from a project perspective to see how are we doing with our allocation per project. Project two is still lacking ten hour allocation in September, but I think one of the views that I actually prefer to most is the date base. Then we're grouping this by date so we can see this week And I actually have stuff this week that's unallocated. So that's not good. What's for this month, what's for last month and future dates of course. And also past dates which can be filtered away from this view if we don't want them. But I usually you only focus on this week and this month for Peter. So we need to assign this to someone. Let's give that to Gustav. And now if we go back to our individual workload, all the changes has been reflected over here because we actually have now assigned people to this day in the main table, are now assigned as the consultant. If we go to my work, everyone will find their allocation of work in my work. Bear in mind this is a demo account, so I don't have these many overdue tasks. But what's due for today, what's due for this week and so on and so forth. And you can also bear in mind that you can add multiple people for this view and as well. There we go. So now I've added more people so I can actually check on how is my team performing this week. And I get a nice little indicator. bear in mind that when you click here you get the ability to communicate and so on and so forth. Right. So quite a nifty way of keeping track of your individual work assignments. So let's just review a little. So we have our projects, whatever information we need on projects, we had our roles which we also have teams assigned to. And then we set up a planning view where we first worked with assigning the roles, allocating the hours. And then we used either the role based, company based project or date based view to actually assigned individuals. All nice and dandy so far after the work has been executed. Of course we want to go down and actually report our time. So this would be the same kind of setup. We have almost the same kind of columns. In this case we're also using item default values to mark them as reported again. So it will look nicer in the workload. in the dashboard later on, we're measuring the hourly rate to understand revenue from here as well. The time reporting view almost looks the same as, what's it called, the planning view. But the difference is that each column is a day. And we can look at this from a week or a month. And currently I am editing this. As a manager, meaning that I can see everyone stop so I can see Anthony, I can see Kurens time entries over here and I can switch different weeks as well. If I were not a manager, just so you can see how it looks, I can then add my project so I can say, the company here and then it would be project one. Okay. And now I can start reporting my time. So let's put some eight hours here, eight hours here, eight hours here and eight hours here. If I do this on a weekly view and I jump to the next week, I can copy for most recent week. So I don't have to set this up every single week for myself. Changing again. Me. Myself Back to manager. As a manager, I actually have the ability to also lock periods. So I can say right now we cannot report any time from July 31st and backwards. So you see you have a padlock now. So if we change to a monthly view this whole month is closed. But once I go to August it's now open. So we can keep reporting over here. we also have just, you know, we have a holiday settings where we can use another board to color code absences over here. So if I go to an absence board and I add some kind of. Let's add Thomas name off. I add myself so it knows it's me I'm going to prove it, of course. And I'm going to do tomorrow off. It automatically puts eight hours. So when I look at the workload widget in a dashboard, it will pull both these hours and the reported hours. And now let's just look at the holiday settings. So this is the corporate ones. And I can also add a personal one absence group approved from day to date. Person calling is Thomas. And let's change that to yellow. Let's just double check my absence I'm putting 23rd of August. Yes. Gonna look at why it's not. Oh, it's because I only look at Anthony. So of course Anthony does not have any absence there. So if I add even I can't keep track of all the features in here. So I totally get it. Let's re-add this project. Project one okay, now I have a long little view here. And yes, my absence day is marked. So for that week I can do 8888. But I don't need to report my absence because in a dashboard it will pull both from the time reporting and the absence board. When? Let's go to August. For July, for example. Let's unlock everything because I need it unlocked. I can now submit all of this for review. What is happening then is that we have an automation that runs. So when the submitted status submitted changed change approval column to ready for a review. This in turn you can put a notification on it so it notifies the relevant people. But the most important thing is that we have a time approval view, which will show you all the stuff that's ready for review, and you can then go in and approve them, all together. From obviously, we understand if people have reported how they have reported our time. So we have a workload widget in here that should basically show this every single week for every single person. Right now we're running it in this board. But the principle of doing this in a dashboard to join in the absence is basically the same. And this is so this is how we can leverage both our planning view and our time reporting view into quite a holistic solution that also allows us to look at some nice little reports where we can see from a project level, what's the plan versus project hours? how are we doing planned versus reported? How is our planned revenue looking like over the year? And then we can follow up on planned versus reported revenue. So you can look at this widget from a few different ways. One, if you are invoicing based on time spent, you can see that we are not working for optimal invoicing here. If you invoice on fixed price, on the contrary, you can see, okay, this is our margins and of course we have invoicing, follow up and stuff like that also in our professional service suite. But today we wanted to focus on planning, resource allocation and time reporting. And with that, I just want to open up the possibility for all the participants if you want to ask a few questions. Other than that, I have covered everything I wanted to cover today. I hope it was informative and you got inspired. Again, if you're curious about the full professional service suite, you can find it on our web page. So you go to www.omnitas.com Solutions. Professional service operation suite. And here you'll find some nice little bullets. An explanation video showing you from A to Z, the whole solution, some in-depth explanations. And also in the end, what kind of add ons and features do we offer? We have a social media suite. We have an omnicloud, omniericher outreach helper, meeting assistant, contract generator, and we can also help you with email integration and bookkeeping integration as well. So feel free to look at our professional service operations solution or anything else. As always, you're welcome to reach out to us with any questions you have related to monday.com. we're happy to assist and consult. And, yeah, since there's no further questions in the chat, I'll mandatory like subscribe and follow our newsletter, write me on Facebook. Come visit us in the Stockholm office. We have an event coming up in Stockholm. We have an event coming up in London. You have all the information on our web page under events. Take care everyone. Thank you.