On Demand Webinars
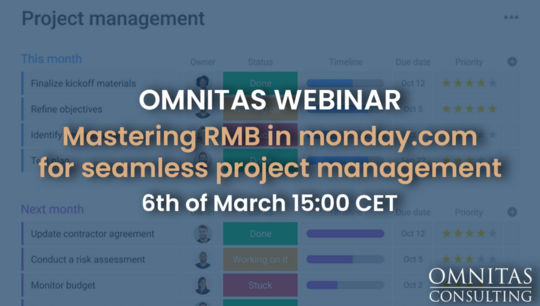
How to manage your professional services operations in monday.com
675 views
Join us for an exclusive webinar hosted by our CEO, Thomas. Discover how our Professional Services Operations (PSO) solution in monday.com revolutionises consultancy workflows. Thomas will provide a comprehensive walkthrough, demonstrating step-by-step how this solution streamlines lead generation, project management, resource allocation, and more. Don't miss this opportunity to optimize your consultancy operations! Improve communication and transparency between departments and with your clients. Register now to secure your spot.
View transcript
Welcome everyone. Today we're going to look at our Professional Service Operation Solution for monday.com. I'm going to close my window. Sorry about that. So we're going to look at our professional service operation solution for monday.com today. This solution primarily targets organizations that works in a set amount of hours, result, or money over a consecutive amount of days, month, or weeks. So really, your professional service operations, SEO agency, some marketing organizations, you could have a lead generation tools and so on and so forth. So very critical to understand that we're not running traditional projects in this solution. We know exactly what we need to deliver for every client because our offering is quite straightforward. Our contract is based on a starting fee, X amount of volume per month, and this is the amount of month that we're going to be working together. We built it into monday.com CRM to make sure that we always have all the client communication built in, and we also have put the whole lead operations opportunity workflow in the beginning as well. So I'm going to take you through it chronologically. So we're going to start with the leads. I'm not going to bore you with entering a bunch of details, but I'm going to talk you through what we have here. So we have a lead board. We kept this very simple as a default from a template perspective. So you can add whatever information you feel is relevant for you guys to have in your leads, of course. But in this case we have the name of the lead. Who's the sales reps, what kind of status, assigned, attempted to contact, contacted, qualified or not qualified? Once qualified, for example, it will create a company in a contact registry and then move over to the opportunities where we'll do the bulk of the operations. What company are we dealing with? Phone number, email, home page, standard stuff. And of course, when we open up the lead, we get a nice little lead card with the lead stage. We get our emails and activities where we can add activities. We can track all our emails and sync everything, and we get all the information we need basically on one screen. This is basic monday.com CRM functionality. Again, once qualified, it moves over to the opportunities and this is really where we start seeing a difference between this solution and other ways of working. So let's collapse the left menu. So we see a lot more stuff on the screen. Grouping here. You can group it in any order you want. New opportunity, in progress and won, is currently what we're doing. We'd like to keep the one opportunities in our opportunity board to make reporting a bit easier. But you can also have a separate board for one and disqualified opportunities. We track the sales rep expected, close date, we have a link to our contacts to the company. We follow up on the stage of the opportunity. So is it a qualified are we doing an analysis. Has it been validated, proposal, negotiation, Contract sent, won, disqualified and lost. Contract sent is an interesting one. In the default setup. This is just a status to make sure that you know that you have sent a contract, but we can go as far and help you to integrate monday.com to any preferred e-signing service. So by just clicking on Contract Sent, there will actually be a contract sent that will be signed in the e-signing service. And then once signed, it can get uploaded into monday.com. So you have everything in your CRM. Usually with these kind of organizations, there's some kind of starting fee, right? We have a starting fee for a workshop or exploratory or to understand your challenges. If it's a recruitment company, this would be to understand the profile of the candidates. For example, we added just from a template perspective, the ability to track different type of projects. In this example, we're just using small, medium, big, just to show you some examples. But this can be anything. And now here's the real value of this. So we have the volume per month. In this example we're doing hours. But this could be a result. This could be x amount of leads. This could be x amount of meetings. This could also be a fixed cost. So $5,000 a month. And then how many months will this contract span for. In this first example here we'll be working ten hours a month for two months with the hourly rate 250. This will give us a value behind the scenes in the main table. We of course have a forecasted value that uses the deal stage. So let's jump in and see that. So based on the deal stage you can get an automatic probability. And that of course can give you a forecast value. So if you want to do your dashboarding based on the forecast instead of the actual value, you have those options. Again, just like in the leads, we have a nice little item card that shows us the deal stage. It shows us our different values. We have our emails and activities and all the information we need and we can of course also modified information from here. So I just talked to these guys and we're going to do 15 hours a month instead of 10. And the deal value went up. This has also now gone into a proposal stage, which in turn will reflect on the probability and so on, and it's moving down into the closing group. We can help you enhance this further. A lot of our clients use as a product library, and we normally use the sub items to specify what kind of products or offerings would be included in this deal. So there's a lot of additional options, but from a basic perspective, we wanted to keep it quite straightforward. So this is the bare minimum of what we need to make this work. Of course, we're going to be closing a bunch of deals, so once this is won, it will then move over to our project staging area. Our project staging area is where all our projects live. We have someone who's responsible, will have a status on the actual project. We'll have a timeline when it was meant to be run. We also again have our months and projected hours. Based on the plan that we then do, we will get a feedback loop here. How many hours have we actually planned? And now we can see that we have over planned 30 hours for project one, and we over plan 5 hours of project two might be totally right, but at least I want that information. And by using monday.com basic conditional coloring, we're making sure that the whole row is red to indicate that we're not looking at a zero value here. Once we have a view of our project over here, that's the time when we actually move into planning out the project. So let's jump straight in to our planning board. The planning board uses monday.com time reporting solution for the planning aspect of this. And we can see the company, the project, the role, any notes that we want to have. We can add additional rows by selecting our company, selecting the relevant project that's actually linked to this. We can then specify the role that we want to work with and add that to the list. From here, we can easily allocate the hours that we previously discussed. So for project five we need to add some senior developers and some senior techs. So let's make sure that we add five hours here. And we had five hours here. That will of course revert back. So when we look at project five over in the projects area, we will now see that we have ten hours more. What we do initially, I don't know if you notice that, but we actually only work on roll. And there's a big reason for this, because we want to plan out our roles or skill sets that is needed for the project first, so we can validate that we can actually execute on this plan. Before we go into the hassle of assigning individuals to the work. Again, it's quite straightforward. Like any other table, you just fill out the numbers. You can then also, if you need to, you can easily push, for example, these hours here. If I want to push them by one month, then I need to delete the 10. I need to write 10 here and then I need to write 15 over here. I can easily go in and just change the status to push one month and both numbers will be moved. And that's all set up again with monday.com native automations. So we're really try to leverage monday.com native functionality and then just connect it with our time reporting solution in order to get this professional service operations solution. So we've done our plan. We think we're done. Let's validate the plan. Right. So we go into our role workload. In our role workload. We actually just check the roles. And we can see that I actually have more capacity than I've planned out. So this is good. I don't have any bottlenecks. I don't have any issues other than the fact that I have staffers that are not working this month. That's another thing. I can also easily see that for July and August, I have more capacity for my senior techs. This can also take all their absence into account. So that reflects automatically in this capacity. So I validated. Now I can do my plan right so I don't need to redo my plan. Otherwise I'll just work backwards and make the changes necessarily over here. So now I can start assigning individuals to my actual work items. And the work items would be about the amount of hours I've allocated for each month for the project and a role. I can do that in a few different views. So we have prepared a role view a company view, a date view and a project. So let's start looking at the role and skill view. So the role and skill view uses the group by functionality and group set by the role column. So now we can see all our junior recruitment consultancy work in one list. And we can see our junior tech work in one list. And we can see our senior tech work in one list. And as you can see, I have a few items down here that are not assigned. So I can go ahead and assign them to Yazan either by going in individually like this or multi selection and assigning them to Yazan like that. Same thing. If I look at this from a client perspective, everything is grouped by client. A lot of you probably want to check this by project. So you have all the different roles within the project, a group that once so we can see how our projects are stacked. But one of my favorite ones is actually the date view because I can have this basically as my priority order. Everything that's due this week or next week, I really need to make sure that it's staffed. Same with this month, but I can then be more relaxed with future dates and assign as we go. I don't have a big urgency to assign individuals because I've already, in the role workload, made sure that we can do the work with the skill sets and personnel I have. Once I've assigned either through the role, company date, or project tab, I can then look at my individual workload. So now we're looking at this, but with an individual focus where I can see again, nobody's overworked really. Well, perfect. I do still see a bunch of gaps. So I can also communicate this to my sales team and try to get them to get some more work for these personnel over here. A good tip if you go to your profile, there's a section called title. If you fill out your title, it actually shows up under your name in the workload widget. So that way you can also easily work with your skills and your team. In this example, with only four people, it's not a problem. But let's say you have 20, 30, 50, 100 resources. You probably don't know exactly what role each of them are. So that's a nice little thing. We covered the lead, the opportunity, the project staging area. We went into planning. We checked the role capacity, we assigned individual, we checked in individual workload. Again, just jumping back to show you how we're doing on the project front. Now I have the ten extra hours down here. So it's red Doing the work so I can find my work either on the main table and I can filter on myself, of course. So now I can see what I'm working on and so on. I could also go into my work where I'll have all the assigned items to me, and this becomes a really good way of working. So obviously this is a demo account. So some past dates and later this week this is what the options I have, I can mark them as done and they go away. So we have a few different options for that. And of course if you are one of those that work in your calendar, you can sync this to your calendar as well. Once we done the work, we then have the ability. If you're an organization that work that way, to actually start doing time reporting as well. I'm currently in here as a manager. That's why I see all the people. But I can also filter in just myself. I'm working on the following two projects and I can at any time just add additional two hours here, two hours there, four and eight hours. And let's give it that eight hour over here as well. Perfect. No problems at all. I can then say, you know what, let's submit these for approval and they will then show up in my Time Approval tab for ready for review, where you can review this either by month or by week. And once approved. All good. Of course, I want to make sure that people have entered all their time and filtering on every individual in this view is not optimal. So what I do is I go into report overview again utilizing a nice little workload widget. I can then make sure that people have their 40 hour checkbox on them. That's how I know that they've reported a full workweek, same as before. We can make sure that absence gets included here as well, so they don't need to report that. The easiest way to include absences monday.com is to actually set up an absence board. You can either have it with a form so they can apply straight into monday.com. You can just have as a data dump, and you can also integrate it to any HR system that you use. But in the end, what is it? Who is it? Time period and how many hours absence. And then that will be reflected back into the workload widget. No solution would be complete without some nice little dashboards. So we have a sales dashboard. We try to keep it rather simple because we know most organizations have their own ways of reporting. So we just wanted to make sure that we have some basics in here for you. But from an opportunity perspective we have average value of one opportunity total for cost and value, total value won this month, a nice little funnel chart to show how the deals are actually progressing through the different stages. Forecasted value per rep. Forecasted value per month. Our sales pipeline value one per month. And then we also have some lead generation and so on as well. Going on. We also of course have an operations dashboard. So this operations dashboard has a few nice little widgets. One of them would be our projected hours versus planned hours. So this is where we can check to make sure that we are not over planning. This is another high level report compares the plan versus the project hours. So we can clearly see in project one that we have planned too many hours versus what we actually contracted. We can see the average contract length for 3.75 months. Of course we want to get this as high as possible. Once we have done the plan and we started reporting, we can also see how are we reporting versus the plan. So if we if it was even I had 50 hours planned, I've reported 50 hours, then it would show up as zero. So these are underreported probably already in progress. And these projects have been over reported, meaning that we probably had to do a lot of extra work for some reason. And we can also see a nice little line diagram over planned revenue per month and at any level, you can put in whatever target suits your organization, of course. This one down here is one of my favorite ones. It's showing the planned versus reported. So if you're an organization that invoice based on fixed fee. Then you basically are seeing your margins here. If you, on the other hand, is an organization that report invoice based on time reported, you see that you still have a bit of work to achieve your potential invoice and invoice over time we'll review as well. With all of this invoicing information comes from the invoicing board, which can be auto populated either from the plan or from the timesheet. So all of these entries here would be automatic. You won't have to go in there and create all your invoicing lines. So bear that in mind. You have a choice. Do I want to invoice based on what I planned, or do I want to invoice based on the time reported? Either way, we can automate it natively in monday.com. So it pushes straight to this invoicing board for you later on with aggregated amount of hours per project per company. We have a few little views here. We have our default view with upcoming invoices and then invoices sent. We can look at this from a date perspective so we can see what's due next week, next month and so on. Or we can check this from a company perspective to see how our company is actually performing based on invoices paid and sent and so on. So if we go to the main table again, we have all the information we need. Who was the agent, what was the company, the project and the date for the invoice? Hourly fee, hours and amount. We can of course make sure to help you to integrate this straight into your bookkeeping software. QuickBooks, Xero, Fortnox, Dynamics, doesn't really matter, so you can have these sent automatically to your invoicing/bookkeeping software as a draft invoices instead. But from the basic what you get in the template, this is just a list for you, and then you need to go and raise your invoice on your own. But we can help you with that enhancement. Just checking the chat to see if there's any questions. Yeah, the UK is enjoying their one heatwave day. We also have a nice little heatwave over here in Sweden. We're at 28 degrees, so I'm happy to be working today. Let's do a quick little recap. Leads, opportunities with start fee volume per month, amount of months. We go into a project staging area. We plan out the work on a roll basis month by month. We then check from a role perspective. Do we have the capacity to execute on the plan? We go into one of the other views to assign the individual consultant or agent. We can then check their individual workload. We go into my work to do our work. We can then go on time, report our entries. And after that we go to the invoicing board. That's really it. What we're doing here is we're leveraging the monday.com CRM with built in automations, and then we're just adding the Omnitas time reporting solution on top of that. This solution is available as an install link to your account. If you're one of our clients you get it for free. Otherwise we'll make some kind of good deal for you. It's available. It can be installed. It can start being used straight away. Also wanted to share with you If you go to www.omnitas.com. and then you go to solutions. You're going to find a solution down here. Professional service operation suite. You'll find a bit more information about the product, about the solution, how it works a nice little intro video. You'll have some promotional material, but also what I wanted to highlight down here is what kind of add ons can we provide. And these add ons are paid like it's a professional service job to implement them for you. But we have our social media suite where we can help you integrate your monday.com to handle all your social media scheduling and content production with a single platform. We have the OmniCloud solution that helps you integrate monday.com to Google Drive, OneDrive, Dropbox. So as soon as a client is created in monday.com, we can also create a client folder or even a project folder for that project or that client in your drive environment. We have the OmniEnricher, which is a really nice little thing. It's actually an Open AI script that we have built. So you browse, you go to any website that has company information. You have a Chrome extension, you press on that Chrome extension, and the company information will be pushed straight into your monday.com as a lead. And then later on, you can just press a button if you want to re-enrich that data. And the cool thing is we're using AI to read a web page. So we're actually is not a scraper. We don't read the code of the page, it's reading the page like a normal user, and then just fetching the data that you want, revenue, amount of employees and so on and so forth. And that's why it works with any single page. It doesn't have to be a specific one. One of my favorite ones, I'm horrible at social media, so without the outreach Helper, I would be totally lost. So this is something we built in monday.com with the help of AI. So it takes the LinkedIn profile of the person. It checks the industry of the company, the geography and the market. And then based on your offering, it actually sends a question to OpenAI, where it works as a BDR for you, and it gives you back common challenges for this persona, for this industry, for this use case, for this geography, which suggested solutions. So the Outreach Helper really helps you build all of that, it helps you with basically by being a BDR inside of your account. We have the meeting assistant. So once you've finished a Google meet, the teams resume meeting. Through AI, we can summarize the call and put it back into your monday.com CRM so you can have that as an event in your emails and activities flow. And as I mentioned earlier, we can help you with contract generation as well. And of course, email integration and, bookkeeping integration as well. That was our professional service operations webinar quite straightforward. very simple, but super powerful. A lot of nice little add ons that we can do on top of it as well. I see I have no questions in the chat, so it must have been super clear. With that, I want to wish all of you a nice summer. Enjoy this sun. Don't forget to subscribe, like and follow us everywhere. Sign up for our newsletter and so on and so forth. Have a lovely rest of the day everyone.